
YOUR CHARACTER, ONE PIXEL AT A TIME
Image to Minecraft Skin
Turn a photo or character image into a Minecraft skin you can rotate, inspect and download.
Our Image to Minecraft Skin generator rebuilds hair, clothing and colors as a 64×64 player texture. Upload one image, choose your arm model, and check the finished skin from every angle.
Sample preview
Loading 3D preview…
This sample starts from the model author’s character reference. It is not a photo-to-skin before-and-after example.
Upload a photo to create your own skin.
Example character reference
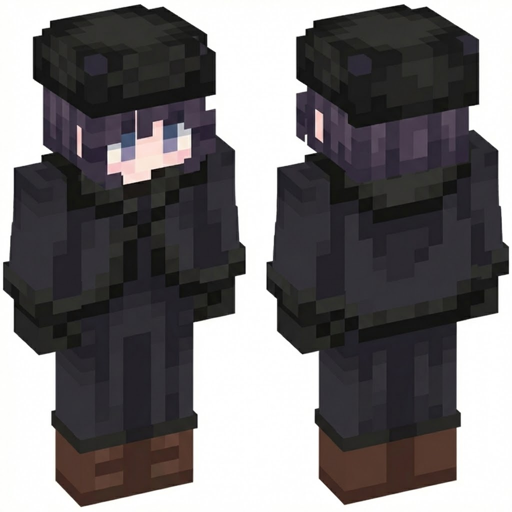
For comparison only. Import the skin PNG, not this reference.
How to convert an image to Minecraft skin
- 1
Upload a clear reference
Choose a JPG, PNG or WebP up to 10 MB. A visible face, hair and outfit give the image to Minecraft skin generator more useful detail. A full-body reference helps with shoes and trousers.
- 2
Choose Classic or Slim
Pick 4-pixel Classic arms or 3-pixel Slim arms. Add a short description if the back of a jacket, a hat or a pair of shoes is missing from the photo. AI first builds matching front and back references, then creates the skin texture.
- 3
Inspect the actual skin
Rotate the 3D player, view the back, and toggle the outer layer. The preview uses the same 64×64 PNG that you download. Check the face, hat, sleeves and seams before using it in Minecraft.
An AI Minecraft skin generator from your image
Use the image to Minecraft skin converter online to create a player design from a photo, drawing or character reference. The AI interprets your subject and arranges the design across the head, body and limbs. You can add appearance details without painting every face of the texture by hand.
A skin needs different views of the character across its texture. Simply shrinking a photograph to 64×64 pixels will not place a face, sleeves and shoes correctly. Image to Minecraft Skin builds a front-and-back design first and converts that reference into the unfolded PNG. Review the final result in 3D before downloading.
Photo to Minecraft skin, with your outfit in mind
A portrait can suggest a recognizable face and hairstyle, but it cannot reveal every part of an outfit. Image to Minecraft Skin uses the visible colors and shapes as a starting point and invents details that the photo does not show. For more control, describe the back of the clothing and anything below the camera frame.
Characters, illustrations and selfies all work as references. Start with one clearly visible person against a simple background. Fine text, logos, glasses and small jewelry may become simpler pixel shapes; a 64×64 texture has limited room for detail.
A 64×64 PNG skin, with Classic or Slim arms
The image to Minecraft skin output is an unfolded player texture. It contains the face, torso, arms and legs in their expected positions. Classic uses four-pixel-wide arms; Slim uses three. Choose the same model when you import the file into your game.
The tool checks PNG encoding, 64×64 dimensions, the selected arm layout and transparency before making a download available. These checks catch broken files, while the 3D preview lets you judge appearance. The generated front-and-back reference is shown separately and is not the skin file.
Check your image to Minecraft skin result in 3D
A flat texture can hide a face on the wrong side or an awkward sleeve seam. Use the front and back controls, then drag the player to inspect the sides. Turn the outer layer off and on to see hats, cuffs and jacket details separately from the body.
Background cleanup preserves white pixels in the base clothing layer. Solid white accessories touching the outer background can still lose detail. If a seam or accessory needs a precise correction, download the PNG and finish it in a pixel skin editor. AI output can vary, so review each result.
Use your skin in Minecraft Java or supported Bedrock apps
In the Minecraft Java launcher, open Skins, add a new skin, choose the matching player model and select the downloaded PNG. In Bedrock apps that support custom skins, use Dressing Room and the imported-skin option to choose the file.
Custom PNG importing depends on the platform. Console editions may not offer the same import controls as desktop or mobile. This image to Minecraft skin tool creates a standard texture; it does not sign in to your Minecraft account, change your equipped skin, or install it automatically.
Image to Minecraft Skin FAQ
Is Image to Minecraft Skin free?
You can rotate the sample skin and compare Classic and Slim without an account. Generating a new skin from your own image requires sign-in and 6 credits. The tool does not offer unlimited free AI generation. Your available credit balance is checked before the job starts.
Does downloading a Minecraft skin cost extra?
Your completed image to Minecraft skin download is included in the generation charge. There is no additional fee to download the 64×64 PNG again from your recent skins. The sample 3D preview is free; creating a new skin from your photo uses credits.
Can I download a 128×128 or HD skin?
This tool exports standard 64×64 PNG skins. It does not export 128×128 or HD skins, or convert an existing HD skin file. Choose Classic or Slim and use the 3D preview to inspect the detail available at the supported resolution.
What image formats can I upload?
Upload a JPG, PNG or WebP up to 10 MB, with each edge between 128 and 6000 pixels and no more than 20 megapixels. A clear image of one character usually gives a more coherent result than a group photo or a tiny face crop.
Can I turn a selfie into a Minecraft skin?
Yes. The photo guides the face, hair and visible clothing. The AI fills in parts that are not visible, so a selfie will not specify the whole outfit. Use the optional details field to describe trousers, shoes or the back of the character.
What is the difference between Classic and Slim?
Classic player arms are four pixels wide; Slim arms are three. Both downloads are 64×64 PNGs, but the arm regions differ. Use the model selected during generation when you load the skin in your game.
Is the 3D character image the file I import?
Import the file from Download skin PNG. The 3D viewer renders that same skin texture. The separate front-and-back reference shows the design used during generation and is not an importable skin.
Does this work on mobile, Java and Bedrock?
You can use the web tool on mobile or desktop. The PNG format is intended for Java and Bedrock devices that offer custom-skin importing. Console versions may restrict imports, so check your device before generating.
What happens if generation fails?
The full generation charge is returned to its original credit buckets if either stage fails, times out or produces a file that does not pass validation. Refreshing the page does not start a second paid job. A completed result may still need visual touch-ups.
More ways to create your character
Bring your image into your Minecraft world
Start with a clear reference, create your skin, and inspect the pixels before you play.
Try Image to Minecraft Skin